I probably will at some point, but as a fellow noob of 2.5 years in game development (the point is that my game is still even nearly not done  ), I’m a bit afraid to teach misinformation / bad practices. But some insight, how I’m currently doing it:
The starting point is your game world in… normal lighting conditions, mine looks like this:
(ignore gaps between tiles, some problem with OpenFL sprite upscaling, I’m working on it).
Then you basically draw a “shadow map”, which is composed of dark colour rectangle (which will produce darkness) and lights. For lights, you will usually use circular gradient of white (or some other light colour, that way you can produce colourful lights) from alpha = 1 on light position to alpha = 0 at maximum distance of the light. As for the shape of the light, you can either draw simple rectangle, or some more complicated shape in case you want shadows. Example of the combination of two lights:
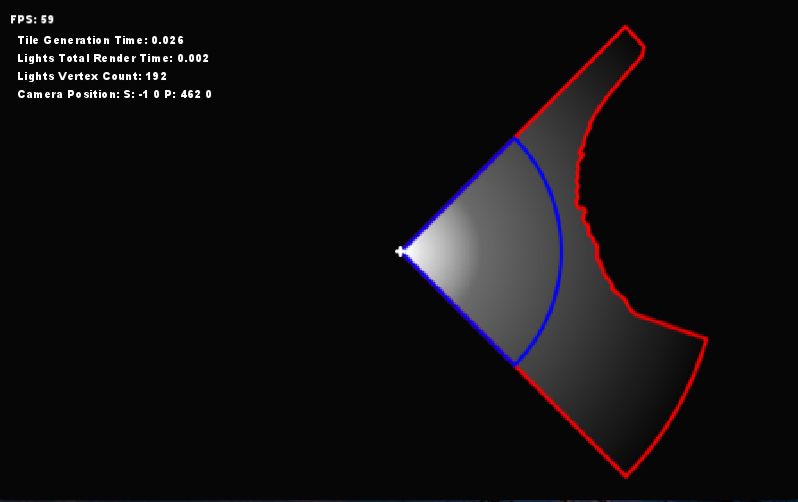
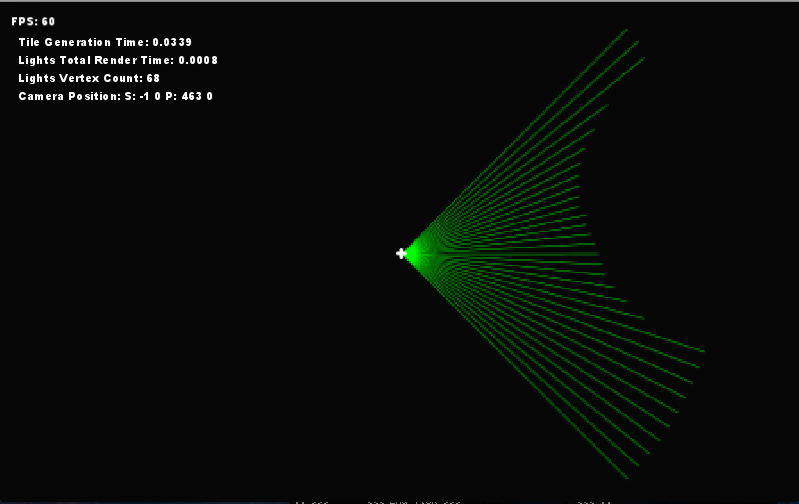
As for the shadows, I basically do a “ray trace” in set amount of directions from the center of the light, compute how far can light go in this direction and then add this point to Vector.
Pseudo code:
var step = light.range / light.numberOfRays;

while (angle > Math.PI - light.angle - light.range / 2){

    var distance = 0;

    // Raytrace the enviroment & generate points
    for (testDistance in 0...light.radius){
        var testx = light.x + Math.sin(angle) * testDistance;
        var testy = light.y + Math.cos(angle) * testDistance;

        distance = testDistance;

        if (there is light barrier on position testx, testy){
            break;
        }
    }

    commands.push(GraphicsPathCommand.LINE_TO);
    points.push(light.x + Math.sin(angle) * distance);
    points.push(light.y + Math.cos(angle) * distance);

    angle -= step;
}
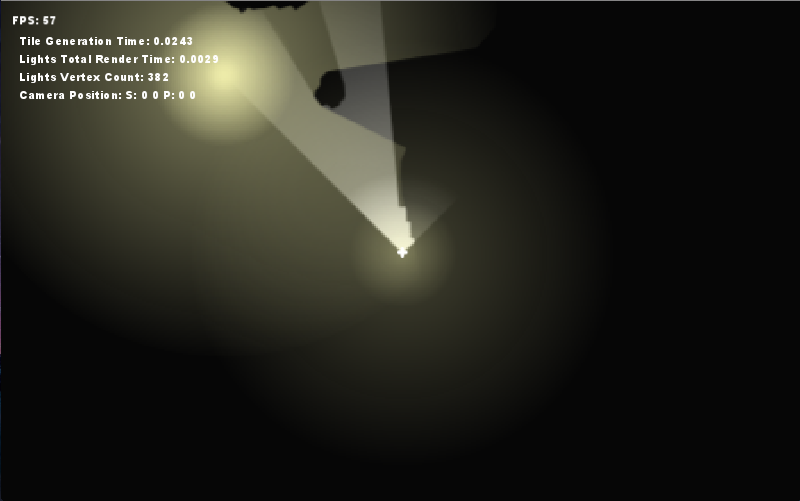
After that I use shadowMap.graphics.drawPath() to draw everything in one batch. It could probably be a lot faster to use shaders, or at least drawTriangles to draw it. Combined “shadow map” of some white and yellow lights could look like this:
All this is drawn to a Shape, which is not on stage (you will not use addChild() on it) every frame, don’t forget to use graphics.clear() on it before drawing every frame (or use some other drawing method). After that, I render the “shadow map” to texture (Render sprites to texture for GL targets) – on stage I have two Bitmap objects with their bitmap.bitmapData of resolution proportional to stage and scaled (I have pixel art graphics) on which I use bitmapData.draw(shadowMap) on every frame. This effectively flattens “shadow map”, so the blend mode is applied correctly.
After that, it’s just matter of right blend mode. I use custom blend modes (BlendMode & GradientFill problems on native), on bitmap on bottom I have
case HARDLIGHT:

    gl.blendEquation (gl.FUNC_ADD);
    gl.blendFunc (gl.DST_COLOR, gl.ONE);
and on the top one
case OVERLAY:

    gl.blendEquation (gl.FUNC_ADD);
    gl.blendFunc (gl.DST_COLOR, gl.SRC_COLOR);
and also apply gaussian blur with shader (bitmap.filters = [new ShaderFilter(shader)]), mine currently looks like this, as I’m GLSL noob:
shader.glFragmentSource = "
    uniform sampler2D uImage0;
    varying vec2 vTexCoord;

    vec4 blur(sampler2D image, vec2 uv) {
        vec4 color = vec4(0.0);

        color += texture2D(image, uv + vec2(-0.0075,-0.0075)) * 0.025641025645;
        color += texture2D(image, uv + vec2(-0.0075,0))     * 0.125;
        color += texture2D(image, uv + vec2(-0.0075,0.0075))    * 0.025641025645;
        color += texture2D(image, uv + vec2(0,-0.0075))     * 0.125;
        color += texture2D(image, uv + vec2(0,0))       * 0.25;
        color += texture2D(image, uv + vec2(0,0.0075))  * 0.125;
        color += texture2D(image, uv + vec2(0.0075,-0.0075))    * 0.025641025645;
        color += texture2D(image, uv + vec2(0.0075,0))  * 0.125;
        color += texture2D(image, uv + vec2(0.0075,0.0075))     * 0.025641025645;

        return color;
    }

    void main() {

        vec4 color = blur(uImage0, vTexCoord);
        gl_FragColor = color;
    }
";
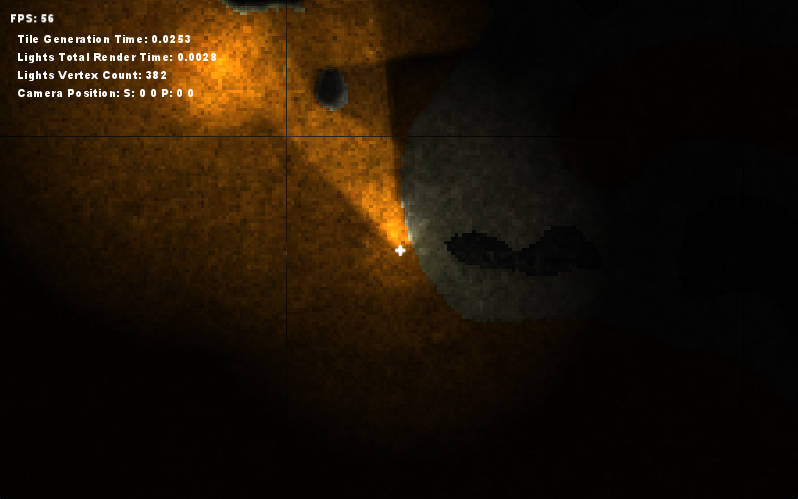
You can experiment with shadow colour and alpha to polish results to lighting conditions you want. The result then looks like this:
And that’s pretty much it.
You will find more information here:


 .
.